- Make your Environment’s variables available via locally mounted
.envfiles, without writing your credentials to disk. - Validate your locally mounted
.envfile setup with Cursor Agent. - Programatically read your environment variables from 1Password in your terminal or in your Go, JavaScript, or Python integrations.
- Securely sync your environment variables to AWS Secrets Manager.
- Share Environments with your team members for easier collaboration and onboarding.
.env files, or by manually adding key-value pairs for each variable.
Requirements
Before you can use Environments, you’ll need to:- Sign up for 1Password.
- Install and sign in to 1Password for Mac, Windows, or Linux.
This feature is not available in 1Password for iOS or Android. - Have 1Password Developer turned on.
Turn on 1Password Developer
- Open and unlock the 1Password desktop app.
- Select your account or collection at the top of the sidebar, then select Settings > Developer.
- Turn on Show 1Password Developer experience.
Create an Environment
- In the 1Password desktop app, go to Developer > View Environments.
- Select New environment.
- Enter a name for the new environment, then select Save. If you have multiple 1Password accounts, you can select which account to save the environment to.
Add variables to an Environment
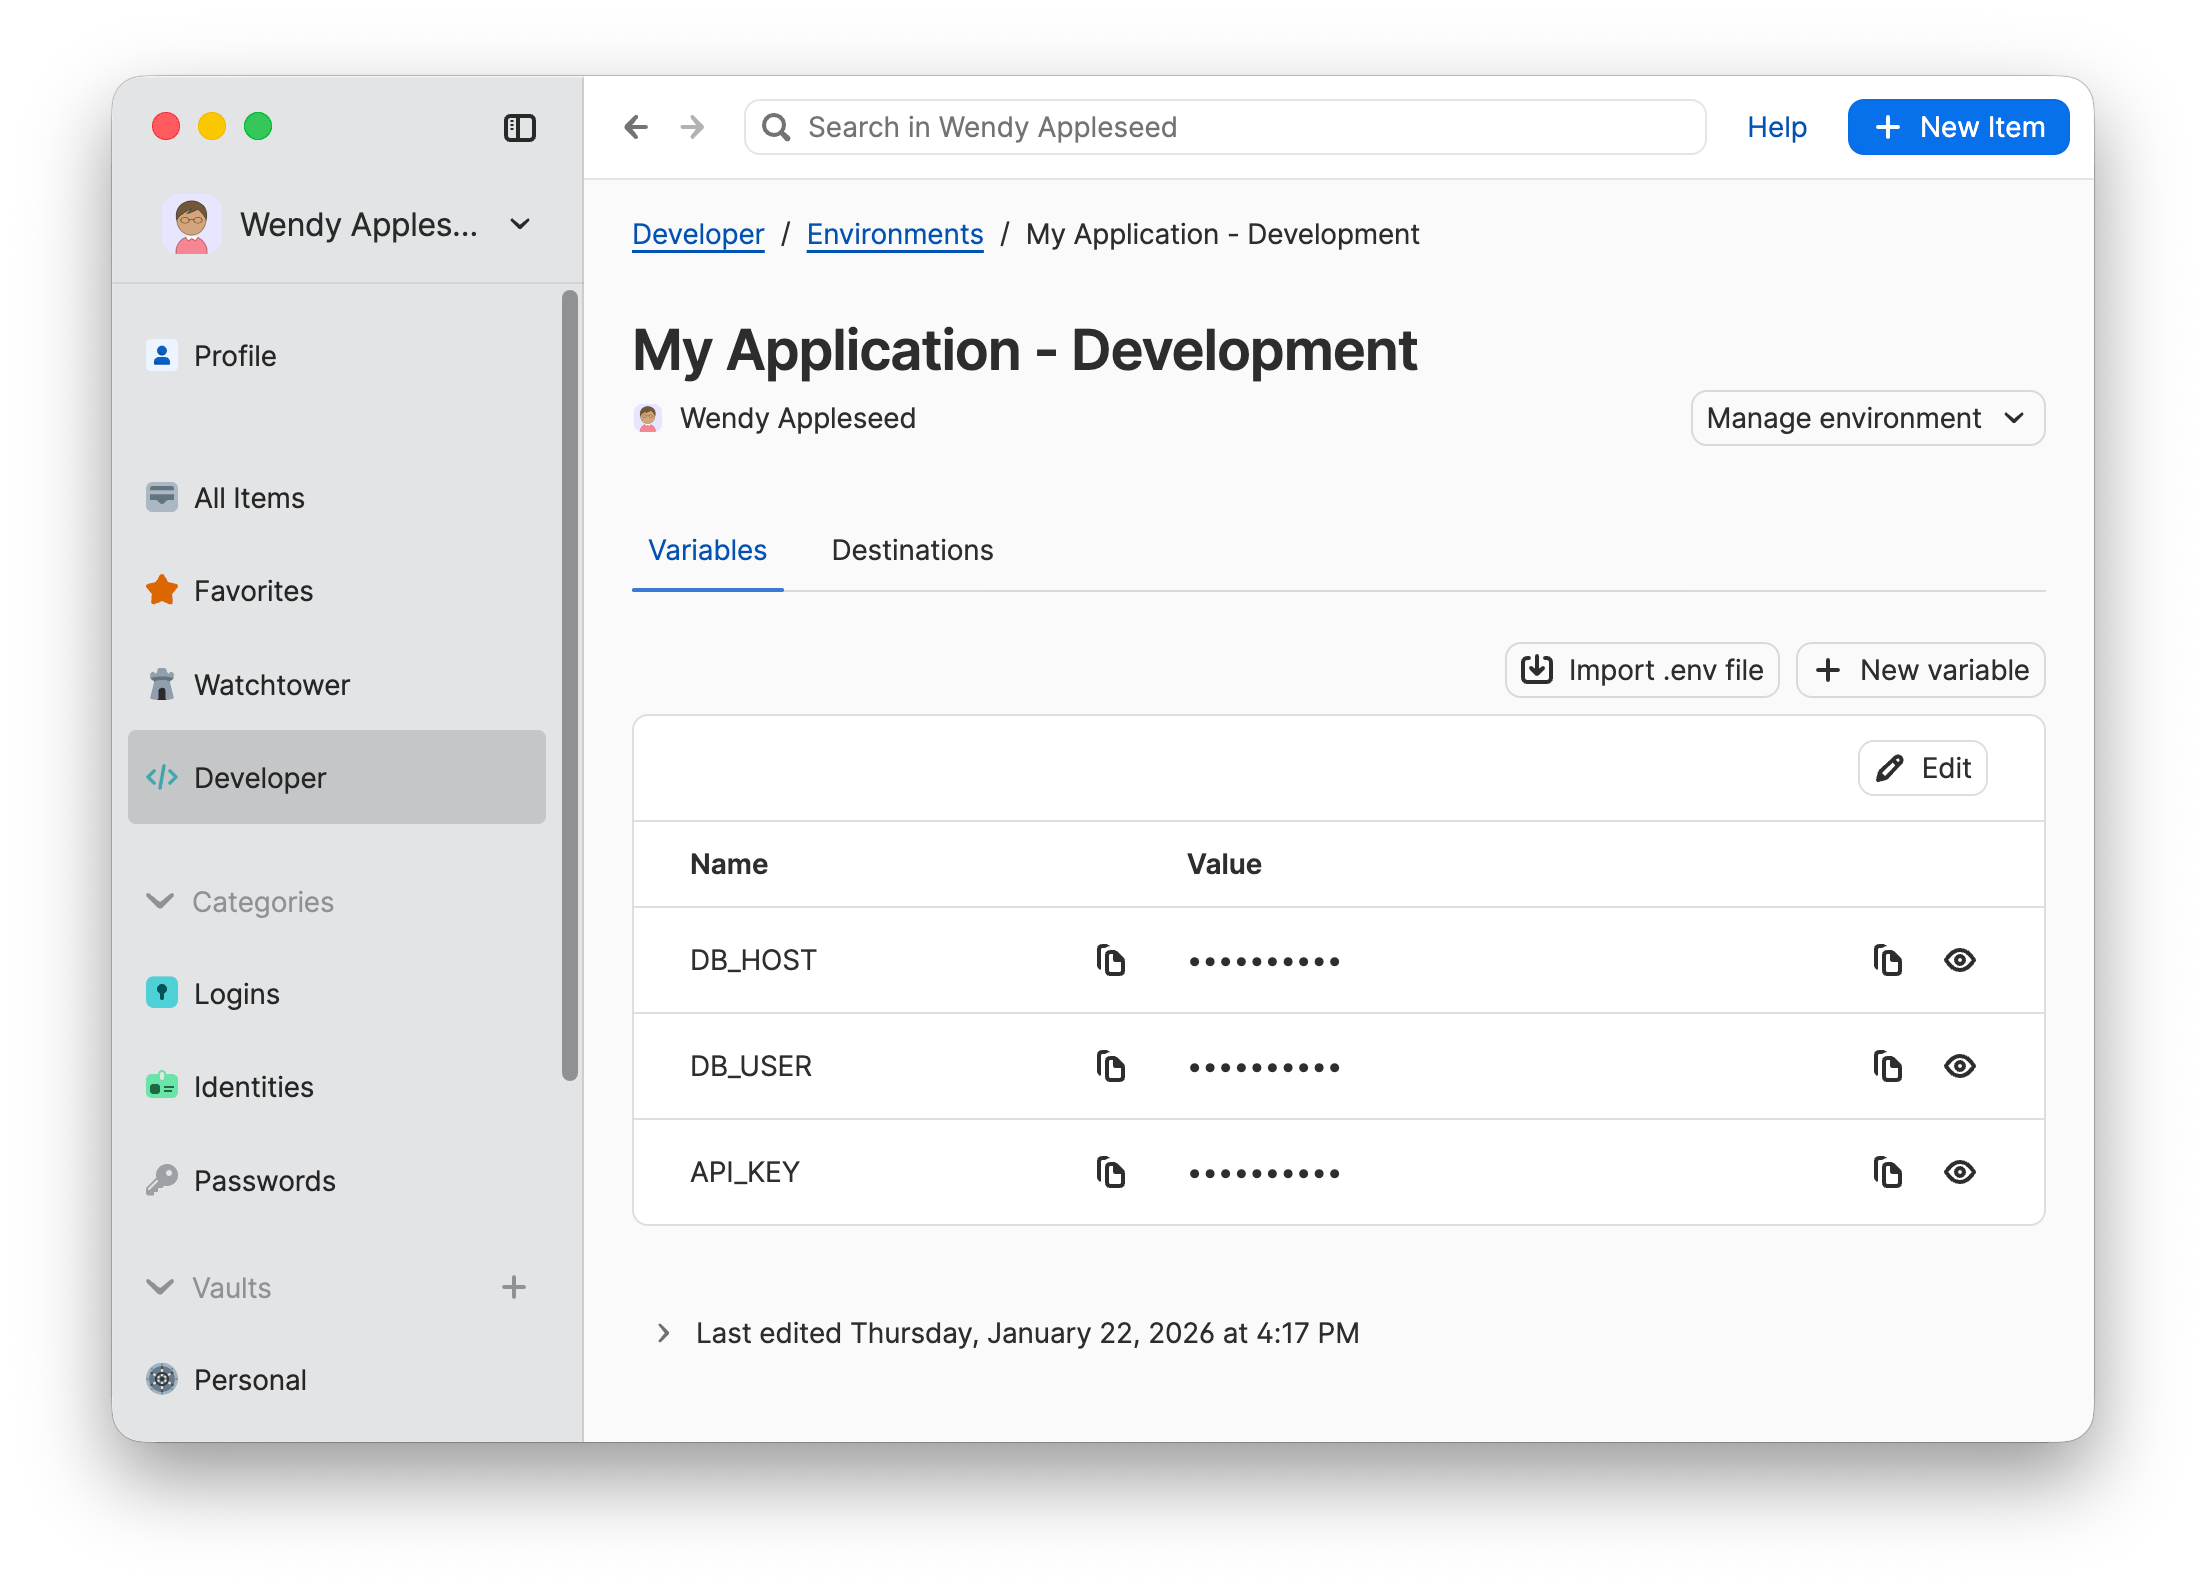
After you create an Environment, you can add your project secrets as variables. 1Password Environment variables map to conventional environment variables . Each variable is a key-value pair that includes a name (for example,DB_HOST, DB_USER, or API_KEY) and a value that holds the corresponding secret.
To add variables to an Environment, open and unlock the 1Password desktop app, navigate to Developer > View Environments, then select the Environment you want to update.
You can add variables in two ways:
- If you have an existing
.envfile for your project, select Import .env file. 1Password will automatically import your environment variables. - To manually add environment variables, select New variable. Enter the environment variable name in the Name field and its secret in the Value field. Repeat this process for each environment variable you want to add.
Values are hidden by default, which means they’ll be masked in the output of CLI and SDK operations. To change this, select the verticle ellipsis next to the variable, then select Show value by default.
Use your Environments in your workflows
In the 1Password desktop app, each Environment has a tab called Destinations where you can configure your Environment to use in your workflows. The following destinations are available:- Local
.envfile: Create a locally mounted.envfile to make your environment variables available during local development without writing plaintext secrets to disk. - Cursor Agent: Use 1Password’s Cursor Hook to validate your locally mounted
.envfiles before Cursor Agent executes shell commands. - Programatically read Environments: Read environments then pass environment variables to applications and scripts using 1Password CLI or 1Password SDKs.
- AWS Secrets Manager: Sync secrets from 1Password to AWS Secrets Manager.
Manage your Environments
Values are hidden by default, but you can toggle the visibility on or off in the Actions column. You can also delete variables from this column. Select Edit within the environment to add, edit, or delete variables at a later time.Rename or remove an Environment
If you want to rename or remove an Environment:- In the 1Password desktop app, go to Developer > View Environments.
- Select the Environment you want to manage, then select Manage Environment.
- Choose Rename environment or Delete environment.
Share an Environment
If you’re using a shared account, such as for a team or business, you can share Environments with your team members. Each Environment remains independent, allowing you to work across multiple environments in different accounts while keeping environment variables separate. Access must be granted for each Environment. To share an Environment:- In the 1Password desktop app, go to Developer > View Environments.
- Select the Environment you want to share, then select Manage environment > Manage access.
- Select Add People, then search for and select the team member you want to add to the Environment. Select Next.
- Select View & Edit, and choose whether the person can view, edit, or manage the Environment.