> ## Documentation Index
> Fetch the complete documentation index at: https://www.1password.dev/llms.txt
> Use this file to discover all available pages before exploring further.
# Use 1Password to securely authenticate the GitHub CLI
export const name_0 = "GitHub"
export const Gethelp = ({command, img, name}) => {
return <>
Inspect your configuration
To inspect your current {name} configuration:
1Password CLI will return a list of the credentials you've configured to use with {name} and their default
scopes, as well as a list of aliases configured for {name}.
<>
{img &&
}
Clear your credentials
To reset the credentials used with {name}:
You can clear one configuration at a time, in this order of precedence:
Terminal session default
Directory default, from the current directory to $HOME
Global default
For example, if you're in the directory $HOME/projects/awesomeProject and you have a terminal
session default, directory defaults for $HOME and $HOME/projects/awesomeProject, and a
global default credential configured, you would need to run op plugin clear {command} four times to
clear all of your defaults.
To clear your global default credentials, terminal session default, and the defaults for your current directory
at the same time, run op plugin clear {command} --all.
Sign in to the 1Password account you want to use with the {name} plugin:{" "}
If you only want to configure the plugin in a specific directory, change to that directory.
Run the command to set up the plugin:
You'll be prompted to import your {name} credentials into 1Password or select an existing 1Password item where
your credentials are saved, then configure when the credentials should be used.
<>
{img1 &&
}
Step 1.1: Import or select an item
Import a new item
If you haven't saved your {name} credentials in 1Password yet, select Import into 1Password.
Enter your credentials, choose a name for the new 1Password item, and select the vault where you want to save
it.
If 1Password detects your credentials in your local development environment, you'll be prompted to import them
automatically.
<>
{img2 &&
}
Select an existing item
If you've already saved your {name} credentials in 1Password, select Search in 1Password.
You'll see a list of related items and the vaults where they're saved. If you don't see your credentials, select{" "}
Expand search to browse all items in your account.
<>
{img3 &&
}
Step 1.2: Set default credential scope
After you select or import your credentials, you'll be prompted to configure when to use the item to
authenticate {name}.
<>
{img4 &&
}
"Prompt me for each new terminal session" will only configure the credentials for the
duration of the current terminal session. Once you exit the terminal, the default will be removed.
"Use automatically when in this directory or subdirectories" will make the credentials the
default in the current directory and all of its subdirectories, as long as no other directory-specific
defaults are set in them. A terminal-session default takes precedence over a directory-specific one.
"Use as global default on my system" will set the credentials as the default in all terminal
sessions and directories. A directory-specific default takes precedence over a global one.
;
};
export const Small = ({children}) => {
return {children};
};
The GitHub shell plugin allows you to use 1Password to securely authenticate [the GitHub CLI ](https://cli.github.com/) with your fingerprint, Apple Watch, or system authentication, rather than storing your credentials in plaintext.
Follow the instructions to configure your default credentials and source the `plugins.sh` file, then you'll be prompted to authenticate the GitHub CLI with biometrics.
## Requirements
1. [Sign up for 1Password.](https://1password.com/pricing/password-manager)
2. Install and sign in to 1Password for [Mac](https://1password.com/downloads/mac) or [Linux](https://1password.com/downloads/linux).
3. Install [1Password CLI](https://app-updates.agilebits.com/product_history/CLI2) 2.9.0 or later.
If you've already installed 1Password CLI, learn how to update your installation.
4. [Integrate 1Password CLI with the 1Password app](/cli/get-started/#step-2-turn-on-the-1password-desktop-app-integration).
5. Install [the GitHub CLI ](https://github.com/cli/cli#installation).
The following shells are supported:
* Bash
* Zsh
* fish
## Before you begin: Create and save a GitHub personal access token
Before you can use 1Password to authenticate the GitHub CLI, you'll need to [create a GitHub personal access token](https://docs.github.com/en/authentication/keeping-your-account-and-data-secure/creating-a-personal-access-token). 1Password authenticates the GitHub CLI with your personal access token instead of a username and password.
If you've already created a personal access token, [skip to Step 1](#step-1-configure-your-default-credentials).
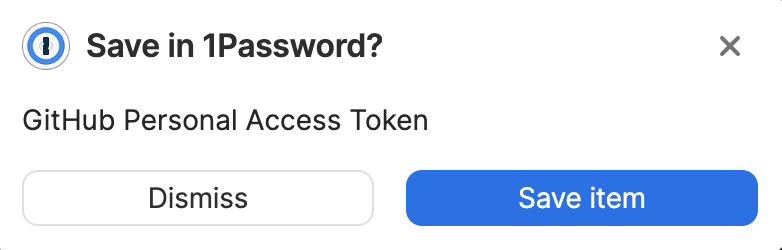
If you haven't created a personal access token yet, you can create one and use the [1Password browser extension](https://support.1password.com/getting-started-browser/) to quickly save it in 1Password:
1. Open and unlock [1Password in your browser](https://support.1password.com/getting-started-browser/).
2. [Follow the steps](https://docs.github.com/en/authentication/keeping-your-account-and-data-secure/creating-a-personal-access-token) to create a GitHub personal access token.
3. Select **Save item** when 1Password asks if you want to save an item for the GitHub personal access token.
4. Choose the vault where you want to save the item, edit the item's name and details, then select **Save item**.
## Step 1: Configure your default credentials
**If you use multiple GitHub accounts**
If you want to use the GitHub shell plugin with more than one GitHub account, like your personal and work accounts, [learn how to set up your plugin to use multiple accounts](/cli/shell-plugins/multiple-accounts/).
If you use a single GitHub account, select **Use as global default on my system**. This will set your personal access token as the default in all terminal sessions and directories.
If you use multiple GitHub accounts, [learn how to use directory-specific defaults for context switching](/cli/shell-plugins/multiple-accounts/).
## Step 2: Source the plugins.sh file
To make the plugin available, source your plugins.sh file. For example:
The file path for your op folder may vary depending on your configuration directory. op plugin init will output a source command with the correct file path.
If this is your first time installing a shell plugin, you'll also need to add the source command to your RC file or shell profile to persist the plugin beyond the current terminal session. For example:
> ~/.bashrc && source ~/.bashrc`} />
> ~/.zshrc && source ~/.zshrc`} />
> ~/.config/fish/config.fish && source ~/.config/fish/config.fish`} />
## Step 3: Use the CLI
## Step 4: Remove imported credentials from disk
After saving your GitHub credentials in 1Password, you can remove all local copies you previously had stored on disk.
```shell theme={null}
rm ~/.config/gh/hosts.yml
```
## Next steps
1Password authenticates with {name_0} by injecting environment variables with the credentials required by the plugin commands directly from your 1Password account.
If you saved your {name_0} credentials in 1Password manually rather than using op plugin to import a new item, make sure that your field names match the table below.
If the item doesn't contain a field with the required name, you'll be prompted to rename one of the existing fields.