

- An MCP configuration for the 1Password MCP server, which allows Cursor to manage your Environments with secure authorization prompts.
- An agent skill that supplies Cursor Agent with end-to-end workflows for interacting with 1Password Environments.
- A hook that runs before Cursor Agent executes shell commands to confirm your locally mounted
.envfiles are set up correctly.
Requirements
- 1Password subscription
- 1Password for Mac, Windows, or Linux
- Cursor
sqlite3installed and available in your PATH, for the validation hook. It’s pre-installed on Mac, and available through your package manager on Linux.
Platform supportThe 1Password MCP server and locally mounted
.env files are currently only supported on Mac and Linux. On Windows, the validation hook exits without a decision, so it never blocks Cursor Agent from running commands.Step 1: Set up your Environments
Before you get started, you can set up the Environments that Cursor Agent will interact with.- Create one or more Environments in 1Password to store your project secrets.
- Configure locally mounted
.envfiles for them.
.env file and mount a local .env file destination on your behalf.
Step 2: Install the plugin
The 1Password plugin is available from the Cursor marketplace. To install it:- Open Cursor and navigate to the Cursor Agents window.
- In the left sidebar, select Customize.
- Select Plugins in the top menu.
- Search for 1Password then select Add.
- Restart Cursor.
1password-environments agent skill, and the MCP server configuration at the same time.
Step 3: Turn on the MCP server in 1Password
1Password Enterprise Password Manager admins can turn the MCP server feature on and off. To do so, sign in to your account on 1Password.com, then go to Policies > Agentic permissions and turn the Local MCP server option on or off as needed.
- Open the 1Password desktop app.
- Select your account or collection at the top of the sidebar, then navigate to Settings > Labs.
- Turn on the Enable local MCP server option.
- Go to Settings > Developer and select Integrate with MCP clients.
- Open Cursor and select Cursor in the menu bar, then select Settings > Cursor Settings.
- In the left sidebar, select Tools & MCPs and look for the 1Password server.
Step 4: Use Cursor to manage your Environments
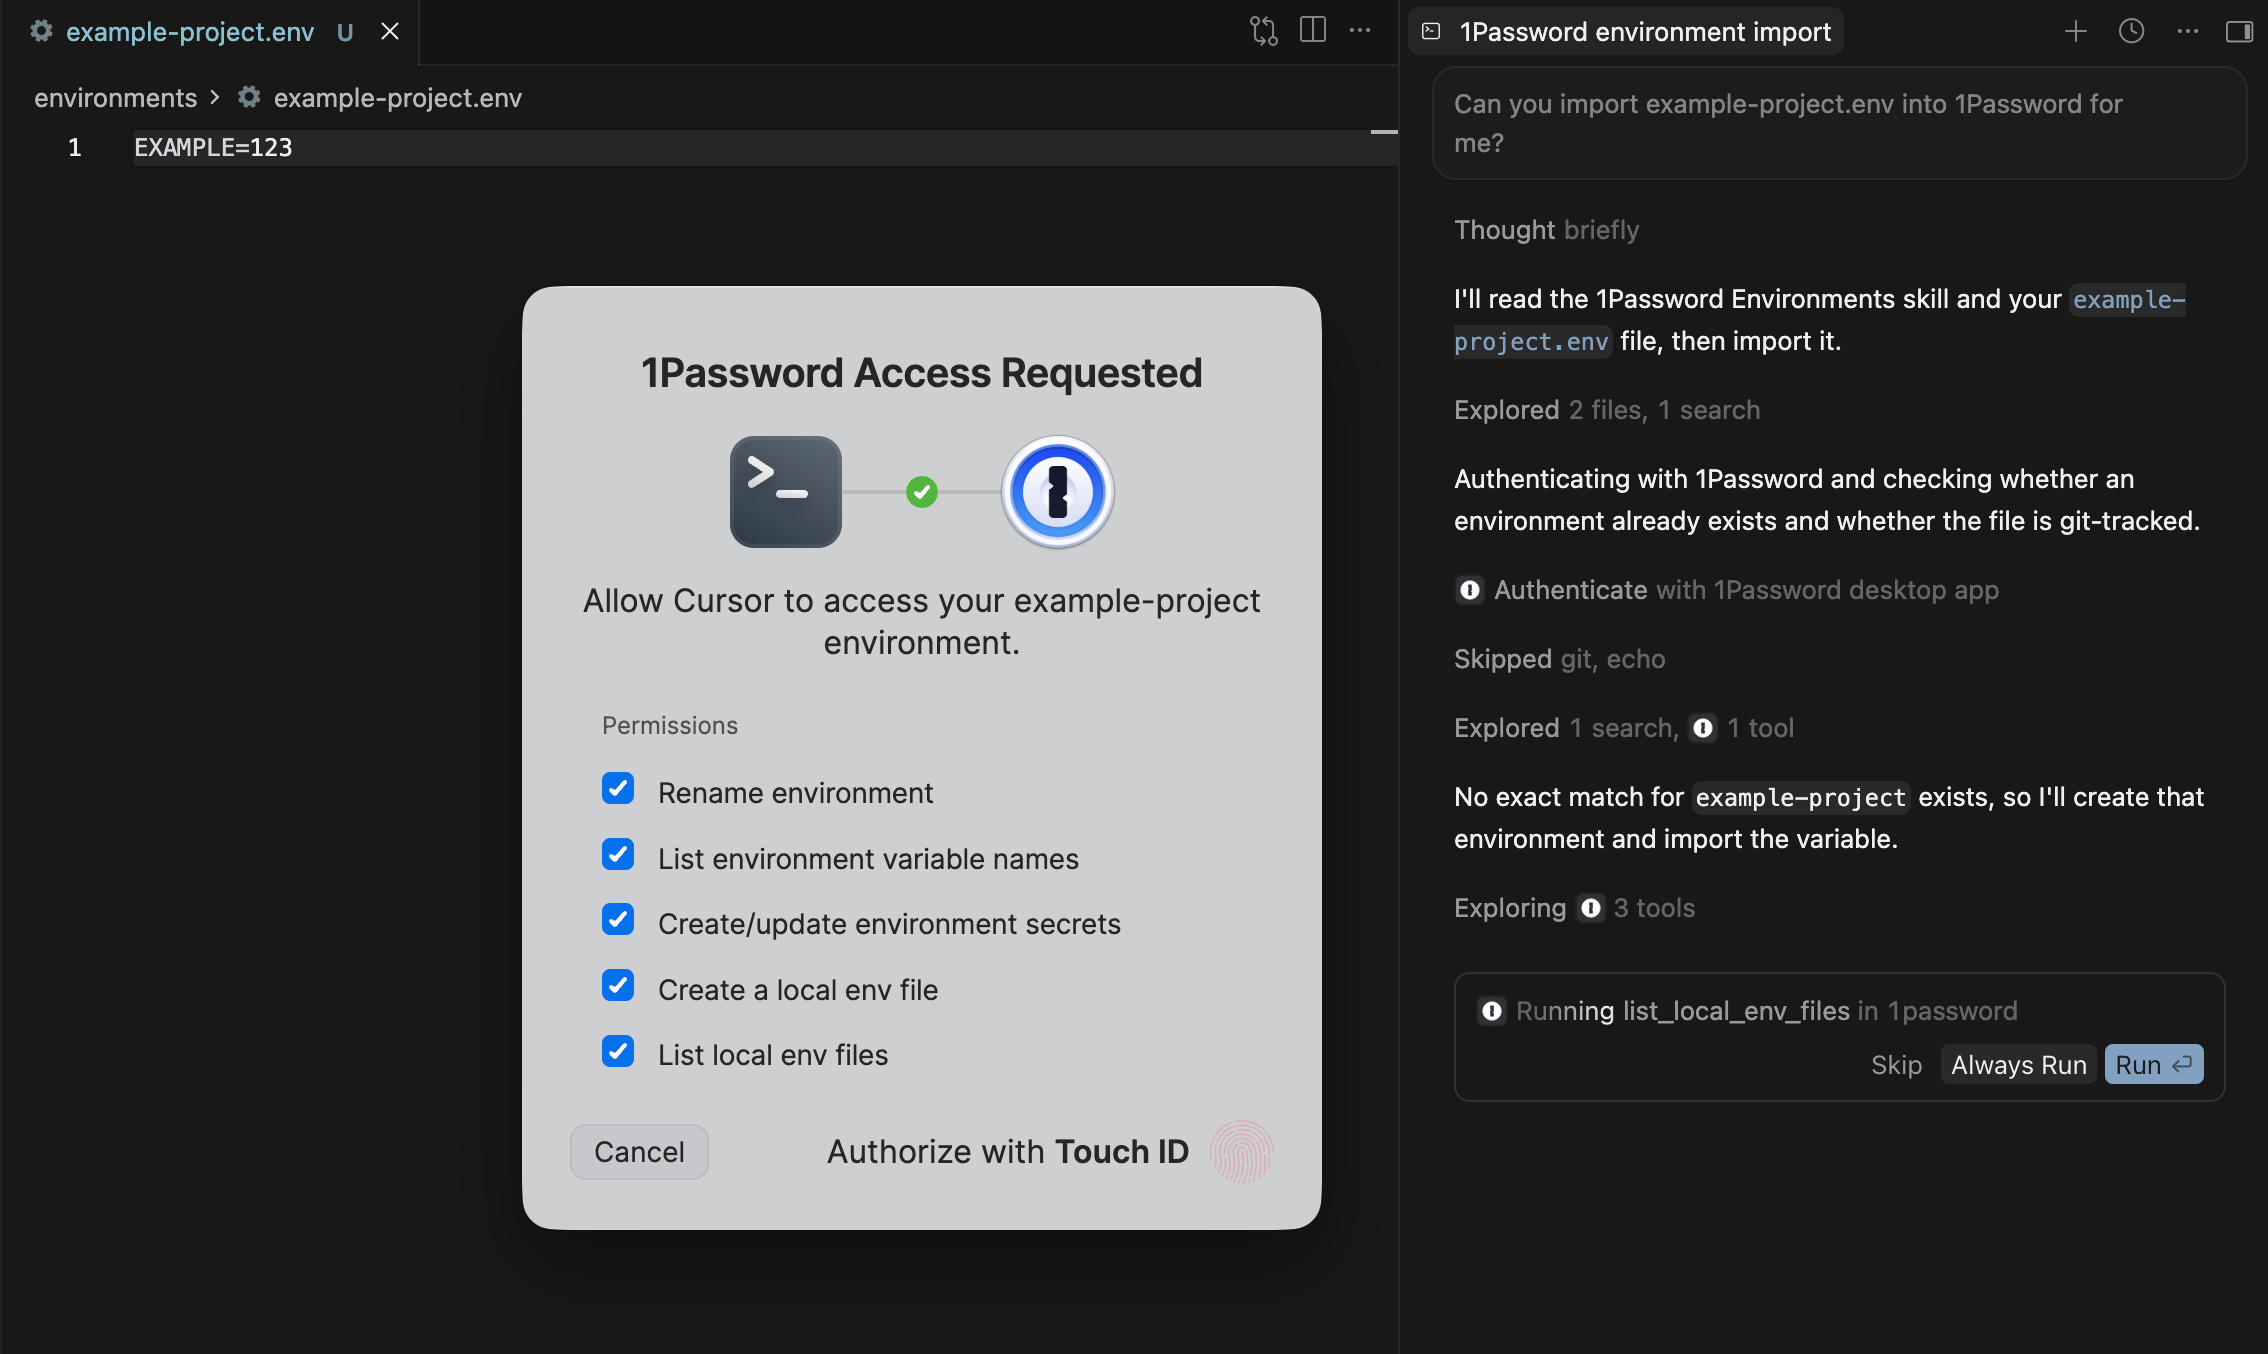
Now that you have the plugin installed, you can ask Cursor to manage your Environments on your behalf. When you first prompt Cursor to access an Environment, you’ll get a secure authorization prompt from the 1Password desktop app that allows you to choose whether Cursor has permission to list and create Environments.Have Cursor import an Environment and make it available in your project
If you have a plaintext.env file in your codebase, you can ask Cursor to import its variables into a 1Password Environment. Cursor will create the Environment then mount it at the same file path as the original file, so your environment variables are available without being tracked by Git or stored in plaintext on your device.
When you ask Cursor Agent to move an existing .env file into 1Password, the 1password-environments agent skill directs it to:
- Read the
.envfile to get its variable names and values, then pass the values to 1Password without printing them in chat. - Create the Environment, or resolve the one you named. If an Environment with the name already exists, the Agent stops and asks how you want to proceed instead of creating a duplicate. You can choose to merge the new variables into the existing Environment or create a new Environment with a different name.
- Add the variables, marking API keys, tokens, passwords, private keys, and connection strings as concealed.
- Mount the Environment at the original
.envfile’s path, then verify the resulting local.envfile.
Learn more about how local .env files work
The contents of locally mounted
.env files aren’t tracked by Git or stored on your device, and are only available at the moment you access them.Validate your local .env file setup
When Cursor Agent tries to run a command, the 1Password hook makes sure any locally mounted.env files from 1Password Environments are properly set up before the agent executes. If any required .env files are missing or invalid, the hook prevents the agent from running and the agent provides instructions for how to fix the issue.
By default, the hook checks the 1Password desktop app to find locally mounted .env files related to your project based on the file path destinations configured in your Environments.
To validate only specific files instead, create a .1password/environments.toml file at the root of your project with a mount_paths array.
Learn more about the local .env file validation hook
See how the hook discovers your mounted files, the validation modes you can configure, and how to use it with other agents and IDEs.
Manage your Environments from Cursor
The 1Password MCP server lets you use Cursor Agent to manage your 1Password Environments with secure authorization prompts. The MCP server only sees variable names, and never returns secret values stored in 1Password to the agent. Your secrets stay safe in 1Password and are only accessed by authorized processes. You can prompt Cursor Agent to perform tasks like:- “List my 1Password Environments”
- “Create an Environment from my project
.envfile” - “Import
.envinto 1Password and mount it here” - “Mount my staging Environment as
.envin this repo” - “What variables are in my production Environment?”
- “Add a placeholder for my OpenAI API key”
- “Create a new Environment called
my-app-dev”
Learn more about the 1Password MCP server
See how the MCP server handles authorization, why your secrets stay out of the agent’s context, and how to use it with other MCP clients.
Telemetry
The validation hook emits opt-in telemetry so 1Password can understand plugin adoption and how often common failure modes happen, like a missing file or a disabled mount. Events are only recorded if you’ve turned on product telemetry in the 1Password desktop app. They include the hook name and version, the client, the validation mode, the number of mounts checked, and whether the hook allowed or blocked the command. They don’t include file paths, file contents, Environment names, or workspace paths. Telemetry runs after the hook returns its decision to Cursor, so it can never change whether a command is allowed. To turn telemetry off:- Open the 1Password desktop app.
- Select your account or collection at the top of the sidebar, then select Manage Accounts.
- Select Usage data then deselect Share information about your usage.