plugins.sh file, then you’ll be prompted to authenticate the AWS CLI with biometrics.
If you use cdk, you can also set up the AWS CDK Toolkit shell plugin. If you use eksctl, you can set up the eksctl shell plugin.
Requirements
- Sign up for 1Password.
- Install and sign in to 1Password for Mac or Linux.
- Install 1Password CLI 2.9.0 or later.
- Integrate 1Password CLI with the 1Password app.
- Install the AWS CLI.
~/.aws/config on Mac or Linux, or C:\Users\USERNAME\.aws\config on Windows. If you don’t have a config file:
- Use
aws configureto create one. - When prompted, skip entering your AWS access key pair to avoid writing your credentials on disk in the
.aws/credetialsfile.
- Bash
- Zsh
- fish
Before you begin: Create and save an AWS access key
If you’ve already created an AWS access key, skip to Step 1. If you haven’t created an access key yet, you can create one and use the 1Password browser extension to quickly save it in 1Password:- Open and unlock 1Password in your browser.
- Follow the steps to create an access key for the AWS CLI.
- On the “Retrieve access keys” page, select Show to reveal the secret access key.
- Select Save item when 1Password asks if you want to save an item for the AWS access key.
- Choose the vault where you want to save the item, edit the item’s name and details, then select Save item.

Step 1: Configure your default credentials
Step 2: Source the plugins.sh file
To make the plugin available, source your plugins.sh file. For example:
The file path for your op folder may vary depending on your configuration directory. op plugin init will output a source command with the correct file path.
If this is your first time installing a shell plugin, you’ll also need to add the source command to your RC file or shell profile to persist the plugin beyond the current terminal session. For example:
Step 3: Use the CLI
Step 4: Remove imported credentials from disk
After you save your AWS credentials in 1Password, you can remove all local copies you currently have stored on disk. Plaintext access keys are commonly stored in your AWS shared credentials file (default location:~/.aws/credentials). If you remove your credentials from this file, make sure to configure shell plugins for any other tools that use the file to authenticate to AWS, like Terraform.
Optional: Assume multiple roles
You can use the AWS shell plugin to assume multiple roles in the same way you’d assume roles with the AWS CLI, by defining role profiles in your AWS config file. For example:--profile flag to call an AWS command using a role. For example:
AWS_PROFILE environment variable. In that case, the --profile flag would only be needed to override the default set in the environment. For example:
Optional: Set up multi-factor authentication
If you use multi-factor authentication with AWS, you can configure the AWS shell plugin to provide your one-time password. You can do this in two ways:- Add the ARN for your multi-factor authentication device to a profile in your AWS config file.
- Add the one-time password code and ARN to the item in 1Password where your AWS credentials are stored. If you choose this option, your multi-factor authentication information will be treated as your
defaultprofile and used globally with every other profile.
Save your one-time password and ARN in 1Password
Step 1: Save your QR code
- Open and unlock the 1Password app.
- Select the item where your AWS credentials are saved, then select Edit.
- Select Add More > One-Time Password.
- Follow the steps to enable a virtual multi-factor authentication device for your AWS account.
- Select Show secret key in the AWS wizard, then copy the string of characters into the One-Time Password field on your item.
- Select Save.
one-time password and mfa serial fields: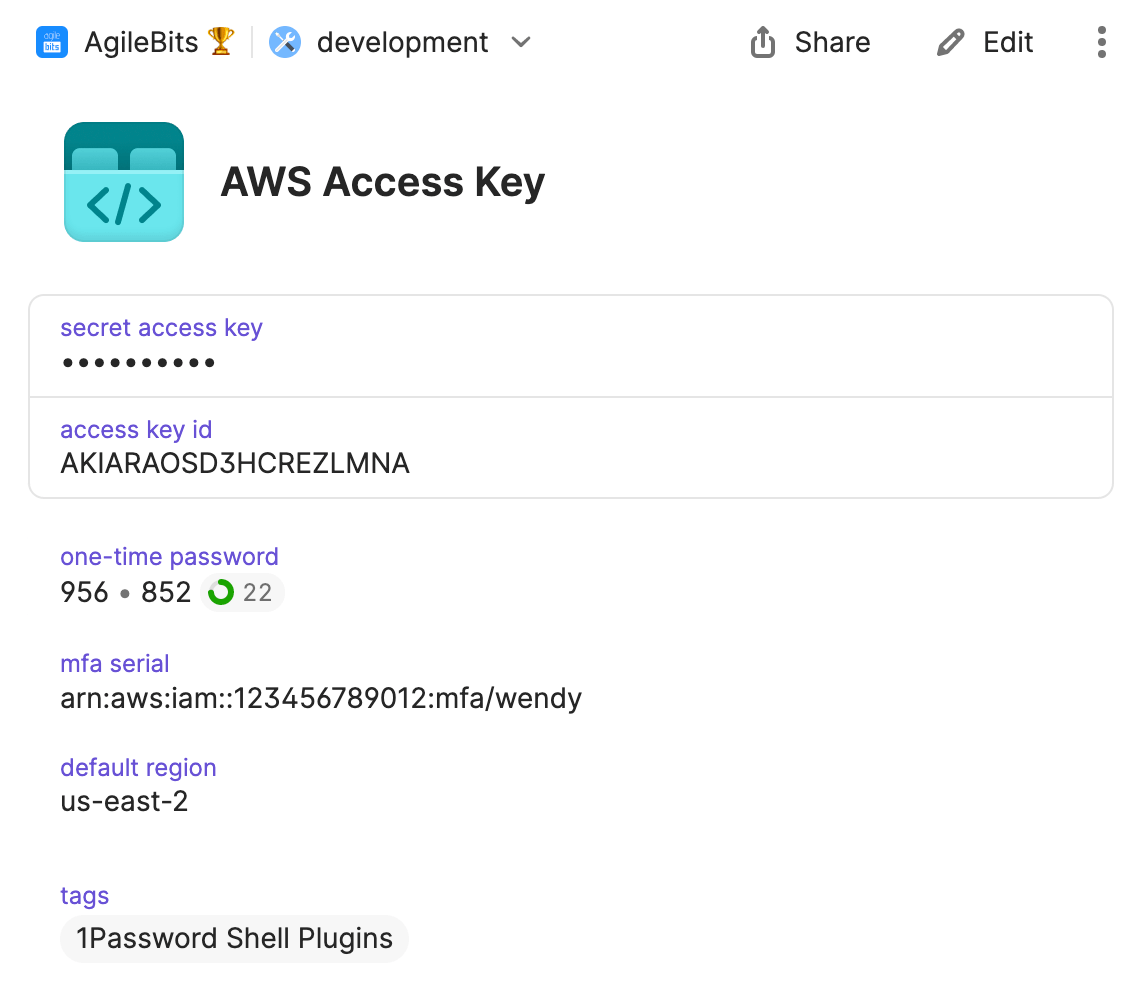
Step 2: Save the ARN for your multi-factor authentication device
- Find the ARN for your multi-factor authentication device and copy it.
- Open and unlock the 1Password app.
- Select the item where you saved your AWS credentials then select Edit.
- Select Add More > Text.
- Paste the ARN as the value of the field.
- Title the field
mfa serial. - Select Save.
one-time password and mfa serial. If your one-time password isn’t detected, make sure your fields are titled correctly.
1Password CLI will then set the AWS_SECRET_ACCESS_KEY, AWS_ACCESS_KEY_ID and AWS_SESSION_TOKEN provisional environment variables to specify the temporary multi-factor authentication session values.
Next steps
1Password Shell Plugins support more than 60 third-party CLIs. To see a list of supported CLIs:
To choose another plugin to get started with:
To use shell plugins for seamless context switching, learn how to configure a plugin in multiple environments or with multiple accounts.
Get help
Reference
1Password authenticates with by injecting environment variables with the credentials required by the plugin commands directly from your 1Password account.
If you saved your credentials in 1Password manually rather than using op plugin to import a new item, make sure that your field names match the table below.
If the item doesn’t contain a field with the required name, you’ll be prompted to rename one of the existing fields.
| 1Password field names | Environment variables |
|---|---|
| Access Key ID | AWS_ACCESS_KEY_ID |
| Secret Access Key | AWS_SECRET_ACCESS_KEY |
| Default region (optional) | AWS_DEFAULT_REGION |